Friday, April 30, 2010

DIY Monogrammed Napkins from a Vintage Sheet


You could carve a rubber stamp instead of a lino-block if you 
prefer.Ripping the sheet makes nice-looking frayed edges.

A simple lino-block print on recycled sheet 
pieces can make some pretty, personal napkins.


A simple lino-block print on recycled sheet pieces can make some pretty, personal napkins.


This project is cheap, diy, as well as vintage and personal, it doesn't get much better than that!

You'll need:
  • A vintage bedsheet (thin and worn is good)
  • Scissors
  • Linoleum block for carving (sold at art stores)
  • Carving tool
  • Screen-printing or fabric ink
  • Palette knife (or a butter knife or spoon will work)
  • Lino-block printing roller
  • Piece of glass, plexiglass, or a cereal box for rolling ink
You could also carve a rubber stamp instead of a lino-block, and use a fabric-friendly stamp pad instead of screen-printing ink, which would be easier and less messy.

When picking out a sheet, keep in mind that if the pattern is too busy, the monogram will be hard to see. And choose your fabric ink color to work best with the sheet (so if the sheet is mostly dark, use an opaque white or pastel ink color).

Make a short snip in the sheet to get it started.
First, you need to cut/tear your sheets into napkin squares. Most old sheets will tear excellently, making a straight edge, which will neatly fray and require no hem or stitching at all. Test to see if it will rip well by making a snip in one side, the size you want your napkin to be, then ripping at the cut. If it does not tear easily, then use your scissors to cut across the sheet.

Hopefully, your sheet will rip neatly and look something like this.
If it does rip well, then tear it all the way across, so you have one long strip. Then, make snips evenly across one side of the strip—I did this by folding it in half, then in half again, and again, then snipping through all the layers on the two sides of the folded piece.

Snipping through all the layers at once will guarantee equal-sized napkins.
Rip at each snip, giving you napkin squares (or rectangles). Repeat those steps for as many napkins as you want.

Don't worry—you will have a big mess of thread after all that ripping!
Now you need to clean up that thready pile of fabric. Go through each square and pull off all the hanging threads. Keep pulling threads off until there are none coming out, which will leave you with neatly frayed edges! Then you can iron them if you want to.

I love how frayed sheet edges look.
If you had to cut your sheet with scissors because it wouldn't rip, you can try to pull threads out to make the frayed edges, or you could choose to sew a hem or sew a zigzag stitch around the edges.

Next will be the printing, which means you can set aside the fabric and get carving! I won't get into a full-on lino-carving tutorial here because there are plenty of those around the Web (like howtolinoprint.com, lino-print-tutorial.blogspot.com, and my favorite, Jezze's printing fabric part 1, part 2, and part 3). Start by figuring out your design and getting it onto the block, reversed (like the mirror image). There are many ways to do this—you can design it on the computer, flip it, print it out, cover the back side of the image with pencil, then trace it onto the lino block. Or print it out not-reversed, trace over it hard with pencil, turn it upside down on the block, and trace the back of it.


If it's a simple design, just draw it onto the block.
Then carve it out. Always be sure to point the carving tool away from your hand!

First, cut around all the edges, then cut the space between.

Carving it out is a simple process, but go slowly and patiently!
If you are using an unmounted piece of linoleum, like mine, then you can cut it with scissors around the design. This means less carving and fewer parts of the block that may get ink where you don't want any.

If you cut around your image, there will be less chance of unwanted ink on your napkins.
Use your knife (or spoon) to plop some ink onto your rolling surface and roll it out—glass, plexiglass, or a mirror is best, but glossy cardboard like a cereal box will work in a pinch.

I use a piece of plexiglass from a cheap picture frame.
Roll some ink evenly onto your carved block and start stamping it onto your napkins. It's a good idea to test it first on a piece of scrap fabric to make sure it looks good. Press it evenly onto the fabric with your hands, or use an extra roller (or a rolling pin or glass bottle) to press it down.

I use a spare roller to evenly press the block onto the fabric.
Lift the block straight up carefully, and there you go!

My layer of ink was a bit thick on this print, making the edges a little messy.
Let the napkins dry, heat-set the print according to the instructions on the ink, and you've got some monogrammed napkins for your wedding (or just for fun)!

I love the changing pattern on the sheet I used!


Thursday, April 29, 2010

Thank You Notes

There is nothing more appreciated than a lovely handwritten thank-you note, seriously. Not enough people give thank you notes, they can be beautiful, simple, elaborate and detailed, or short and sweet. Regardless of the style they should be sent, and they are also a great opportunity to share a favorite wedding photo.
Lightphoria Photography

When should I write it?
Contrary to popular belief, the happy couple does not have a year’s grace period. All thank you notes should be written within three months of the receipt of the gift. Ideally, a response should be written on the day you receive a wedding gift. If that’s not possible, set a daily goal. It’s a lot easier to write three or four notes a day than to have to write a hundred notes in a month after the wedding!

What stationery should I use?
First of all, stationery is the key word here: No fill-in-the-blank cards, no phone calls, no emails and no generic post on your website!

Who needs a note?
  • Anyone who gives you an engagement, shower or wedding gift, even if you have thanked them in person. Individual notes should be written to people who contributed to a group gift.
  • Anyone who gives a gift of money: cash, checks, contributions to savings accounts and donations to charities. Mentioning the amount is optional, but it does let the person know the correct amount was received. You should mention what you plan to do with the money.
  • Your attendants. A warm personal note attached to your gifts to your attendants will let them know how much you appreciate their efforts and support on your behalf.
  • Anyone who hosted a party or shower for you. Ideally these notes should be written within two days of the event. Each host or hostess should be thanked individually with a note and a thank you gift.
  • People who house or entertain your wedding guests. A note and a small gift should be sent to anyone who houses or entertains out-of-town wedding guests.
  • People who do kindnesses for you. The neighbor who accepts delivery of your gifts when you are at work; the cousin who supervises the parking at the reception – anyone who assists you before, during or after your wedding.
  • Suppliers and vendors. Anyone who exceeds your expectations will appreciate a courteous note of thanks.
  • Your parents or whoever is hosting your wedding.
Do’s and Don’ts of Thank You Notes
  1. Do personalize your notes and make reference to the person as well as the gift.
  2. Do remember that a gift should be acknowledged with the same courtesy and generous spirit in which it was given.
  3. Do be enthusiastic, but don’t gush. Avoid saying a gift is the most beautiful thing you have ever seen unless you really mean it.
  4. Don’t send form letters or cards with printed messages and just your signature; don’t use email or post a generic thank you on your wedding web site in lieu of a personal note.
  5. Do promptly acknowledge the receipt of shipped gifts by sending a note right away or calling and following up with a written note in a day or two.
  6. Don’t mention that you plan to return a gift or that you are dissatisfied in any way.
  7. Don’t tailor your note to the perceived value of the gift; no one should receive a perfunctory note.
  8. Do refer to the way you will use a gift of money. Mentioning the amount is optional.
  9. Don’t use being late as an excuse not to write. Even if you are still sending notes after your first anniversary, keep writing! 

Wednesday, April 28, 2010

Tip, Tips, Tipping


Tipping Etiquette
 
Tipping etiquette at a wedding is often confusing, I get asked about tipping etiquette at least twice a week. Although we tip service providers in everyday life when it comes to your wedding day the etiquette of to whom and how much to tip can be bewildering. Tipping is supposed to be voluntary. However service providers do expect tips nowadays. Traditional wedding custom is to tip a wedding supplier if you think that they did a great job or provided you with outstanding service. Tipping should be based on the quality of service provided to you on your wedding day and in the run up to your wedding. By tipping them you are letting them know that you are happy with the service they provided you with prior to and/or on your wedding day. If you appreciate the work that they have done for you then you can show your appreciation by tipping them.


Tipping Guidelines

There are some wedding vendors who you will be expected to tip and there are vendors who while not expecting a tip would greatly appreciate it. Below are some tipping guidelines which suggest amounts each service provider should be tipped according to standard wedding etiquette:

Hairstylist, Makeup Artist, Beautician - You should expect to tip these service providers just as you would on a normal visit to a salon. Tips should be 15% - 20% of your total bill.

Officiant (Clergy, Priest, Minister, etc...) - Although officiants do not usually ask for a "tip" for their services they do expect you to make a donation to the church or their organization. As to the amount of the donation, traditionally they will suggest an amount when you finalize arrangements with them. The amount varies from a flat fee to an honorarium and can range from $50 up to $500. If you are expecting the officiant to travel outside of their local area then you should also compensate them for their travel costs. Do not directly offer a tip to an officiant. The nominated tip giver should pass the agreed amount to the officiant after the ceremony.

Officiant (Civil Servant) - If you are using the services of a civil servant, such as a judge, Justice of the Peace or a City Clerk, then you are allowed to tip them (although it should be called a “donation” rather than “tip”) provided you do not exceed $75 and you must ensure that it is paid to them outside of court/office hours.

Transportation (chauffeurs, limousine drivers, horse-drawn carriages, etc) - Do check to see if a gratuity has been included in their bill as this is often the case with transportation fees for weddings. If not or if you want to reward them for their service on your wedding day then the norm is to tip them 15% of the total cost of the bill.

Valets and Parking Attendants - Tips should range from $1 - $2 per car.


Coat Check and Restroom Attendants - Tips should range from $1 - $2 per guest.

Waiters and Waitresses - It is not necessary to tip the servers if you have already paid a gratuity in your contracted price. Check to ensure whether a service charge is included in the caterer’s contract. If there is no such provision then you should expect to tip 15% - 20% of the total food bill. Although it is not expected for you to tip individual serving staff if you decide that a particular individual has provided you with first-class service then feel free to give that server an additional tip.

Catering/Venue Manager – Traditionally the caterers and venue management will calculate a tip into their cost estimate, in the form of a service charge. Check your paperwork and if in fact a service charge has not been included then you should allow 15% - 20% of the total bill or $1 - $2 per guest.

Bartenders - Usually you will find that the bar manager will add a service charge to the bar bill. If this is not the case then you might want to tip the bartenders 10% of the total amount of the liquor bill. This amount can be shared out between them equally if there is more than one bartender.

Seamstress/dress fitter - Although it is not customary to tip your seamstress or dress fitter if you feel that they have made an extra special effort on your behalf then tip them between $15 - $30.

Wedding Planner - Wedding planners work for a set fee and will not expect a tip. If you want to show them how grateful you are for their hard work in planning your wedding then 10% of their total fee is adequate.

Wedding Planner Assistant - If your wedding planner has an assistant who is present the day of your wedding it is customary to tip them for their contribution to your wedding day, a tip of $50 - $100 is standard.
 
Delivery Staff (including Florist, Bakers etc.) - Staff responsible for your flowers and wedding cake do not expect to receive a tip. You will have agreed to pay their set fee and that is sufficient. However if you feel that they have provided you with exceptional service and/or outstanding quality of products then a tip of $10 - $15 per person is adequate.

Church Organist or Church Musician - This fee is usually included in the rental fee for the church. You should check your paperwork and if this is not the case you should tip them between $25 - $40 per person.

Musicians - Live musicians do not expect to receive a tip but if you consider their performance at your reception to be exceptional and worthy of a tip then you should allow $20 - $25 per band member.

DJ - As with the musicians, if you consider the DJ’s performance to have made your wedding reception swing then a tip in the range of 15% - 20% of their fee is appropriate.

Photographers - While most photographers do not expect a tip if you want to reward them for their good work on your wedding day then this should be between $50 - $100.

Contracts - read the small print
I recommend that you thoroughly read your contract with each supplier to see if a tip is included in their price. Some wedding package rates include tips. You should note that some vendors, most notably caterers, add a gratuity to the foot of their bill and they usually call it a service fee or service charge. Most wedding suppliers will inform you of their tipping policy when you enter into an agreement with them for their services. If you are at all confused then ask the supplier directly for an explanation of their service charges and tipping policies. You must be clear about what each wedding supplier is being paid so that you can make judgment calls on whether or not additional tipping might or might not be necessary. Another good reason for being clear about the tipping policy for each supplier is to that you do not end up double tipping them!
 
Additional Tipping Tips!
 
* Traditionally if you don't have a Wedding Coordinator, it is the Best Man's duty to take care of tips on your behalf on your actual wedding day. If they are unwilling or unable to accept this responsibility then nominate one person who you feel comfortable with and who is happy to handle this task. This person should be responsible for distributing the tips amongst your wedding suppliers. To make it easier for the nominated tip distributor you should label envelopes prior to the wedding day and pass them to the nominated person to keep safe and hand out at the relevant times throughout your wedding day. By labeling them you will ensure that the correct amount of tip goes to the correct supplier. Always provide the nominated tipper with a contingency fund envelope containing a bit of extra cash just in case you have forgotten someone important who you feel deserves a tip on your wedding day or you might decide to tip someone a bit extra on the actual day.

* A common question is who should the tip be presented to with regard to groups of wedding suppliers. The answer is to hand it to the head of the group. For example with a band the tip should be given to the band leader and with waiting staff it should be presented to the head waiter or maitre d' who will ensure that it is distributed evenly amongst the team.

* If any of the wedding service providers you are utilizing are friends or family then you should definitely ensure that you tip them generously!

* An important point to note is that if you are tipping the valets, coat check and restroom attendants and particularly the bartenders (who are notorious for putting out their own “tip jars”) agree with them and the venue manager that it is unacceptable for these members of staff to accept tips directly from your guests. A sign placed near each of these services that says “No Tipping Please” should be sufficient to deter your guests from offering tips and deter the staff from accepting them!

* You might want to consider tipping your wedding service providers prior to the wedding day in the hope that they will go the extra mile and ensure that everything is faultless on your wedding day.

* Inevitably during your wedding day your wedding vendors will need to be fed and watered. You should expect to feed your Photographers, Videographers, Planner, DJ and Musicians. They cannot provide you with a good service if they are running on empty! Caterers will usually ask you what provision you want to be made for these service providers during your wedding reception and will make some suggestions as to menus and seating arrangements. It is important prior to the wedding day to agree with the caterers and confirm to the individual service providers where they will eating on your wedding day. This will ensure that on the day there are no slip ups or confusion. You will also be expected to bear the costs of drinks for the above mentioned wedding vendors on your wedding day.


 * Regardless of whether or not you choose to tip a vendor if they did a good job you should ALWAYS send them a thank you card expressing your appreciation and satisfaction with their services, and of course word of mouth referrals and positive reviews are always an excellent tip!

Wednesday, April 14, 2010

Free Wedding Show on April 17, 2010 in Snohomish


I am so excited to be sponsoring this wedding show! First off it's at my own wedding venue, Swans Trail Chapel in Snohomish, so that makes it great on it's own, secondly we have a huge list of some of my favorite vendors participating, and lastly there is no charge to attend, and how rare is that?

I have attended so many wedding shows, some super expensive, some more reasonably priced, but the outcome is usually the same, I am paying to sample food, cake and meet vendors that I may want to hire, why should one pay for this???

So again, this show is FREE, there are so many wonderful vendors participating, most are also offering discounts, which is ALWAYS helpful!

I will be holding a drawing for a FREE day of coordination package to one lucky couple, and will also be offering a 25% discount if booked at the wedding show, if you also book the venue at the show I will give you an additional 25% discount, holy smokes, thats 50% off coordination for booking an amazing venue at a discounted wedding show price and booking a top notch Coordinator.

And that's just me, other vendors are offering their own specials.

Here are the details:
Picture

Saturday, April 17, 2010 12-4 pm 
Swan's Trail Chapel
5419 64th St SE, Snohomish - (425) 315-5623

Vendors Include:

  1. A Chapel on Swans Trail www.swanstrailchapel.com
  2. As you like it Catering www.cateringasyoulikeit.com/
  3. Exquisite Events www.exquisiteeventsseattle.com
  4. Perfect Petal Designs www.perfectpetaldesigns.com/
  5. Encore Four www.encorefour.com
  6. Highlands Lofts White Dove Release www.highlandloftswhitedoverelease.com/
  7. Len Smolen (officiant) www.weddingyourway.net
  8. Clane Gessel Photography www.clanegessel.com
  9. Jenny GG Photography www.jennygg.com/
  10. All About weddings & Celebrations  www.allaboutweddingsnw.com
  11. I love Blush www.iloveblush.com
  12. Our Hobby to your home (custom signage) www.ourhobbytoyourhome.com/
  13. British Motor Coach www.bmclimo.com
  14. Kelli’s Cake Creations www.kelliscakecreations.com/
  15. Dryden Calligraphy www.drydencalligraphy.com/
  16. EE Videography www.eevideography.wordpress.com/
  17. Swash (invitations and stationary) www.swashpress.com/
  18. Abbey Party Rents www.abbeypartyrents.com/
  19. WA Fruit Carving www.wafruitcarving.com/
  20. A Tailored Affair www.theweddingandeventshowroom.com
  21. Allstar Entertainment (DJ & Photo Booth) www.allstarfun.com
  22. Monica Schley (Harp) www.monicaschley.com
  23. Bella Cupcake Couture www.bellacupcakecouture.com
  24. Trophy Cupcakes www.trophycupcakes.com
  25. Seattle Metropolitan Bride & Groom www.seattlemetbrideandgroom.com

Saturday, April 10, 2010

Pinks can really pop

White weddings are simply elegant and stunning.  But splash some vibrant color on your dream day and your event can truly come alive!  We're big fans of throwing rules out the window when it comes to decor, so whatever palette, color, or combination strikes your fancy...have fun with it!  These magnetic pinks whether mixed with navy or eye-catching green, make their wedding pictures pop.


Tuesday, April 6, 2010

Long Tables

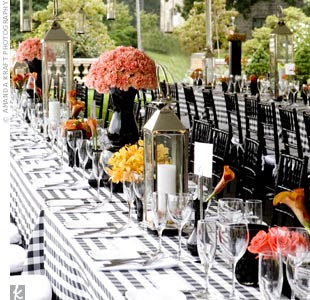
I have a thing for long tables at wedding receptions, this was not always the case. I used to detest them, I loved the uniformity of rounds, the ability to alternate table decor, I loved everything about rounds. I used to have an inner cringe at the mere mention of banquet tables. However all that changed when I decided to use them for my own wedding, no not because I had an epiphany overnight, but I did want to stay within my budget and that's the table choice of my venue.

I scoured the internet for banquet table photos, looked back at past weddings I have done, and wow, how did I not see before how abso freaking lutely gorgeous they can be? Not only do they look stunning, there is something wonderful about having your entire guest list at one table! You can’t get more intimate than that.

Take a look at these brilliant long table receptions and you’ll see why I’m a crazed fan.


long table  wedding jekyll club
long table wedding reception dc nearlywedslong table wedding leigh millerlong table wedding reception picasa weblong table winery wedding
Photos: Jekyll Club; Eventique WeddingsDC Nearlyweds; Leigh Miller Photography; Dale Wallace ; Allegro Photography88 Events Company The Knot

Monday, April 5, 2010

I’ve got a thing for herbs

I’ve got a thing for herbs. Every year I plant lavender, rosemary, parsley, sage, lemon thyme, chives, dill, mint, basil and oregano. By mid-summer, I’ve got enough herbs to supply a hoppin’ gourmet restaurant.

Hello green wedding!
Lavender bouquet photo by Tine Hofmann
Lavender bouquet photo by Tine Hofmann.

Lately, I’ve discovered so many beautiful ways that herbs can be incorporated into a wedding – from the bouquets to the boutonnieres. Here are some ideas that I love:
potted herbs as wedding favors
You can use potted herbs as green wedding favors. Use terra cotta pots which are eco-friendly. Photo by Miki Duisterhof.
lavender halo and lavender bouquet
Lavender makes lovely halos and wedding bouquets. Photo from Sunshine Lavender Farm.
Herb wreatch with lavender
What about an herb wreath to hang on the door of the church? Photo California Wreath Co.
a hanging herb bouquet
A hanging herb bouquet for your outdoor reception. Photo alice q. style.
herb boutonnieres
Mint boutonnieres from In Style Weddings .
lavender boutonnieres
Lavender boutonnieres from Snippet and Ink .
lavender centerpieces
Herb and wildflower centerpieces from Snippet and Ink .
sage handmade soap
Sage handmade soap makes for perfect green wedding favors. Photo Good Earth Soap.
For more ideas on how to use herbs in centerpieces watch this short video from Sunset.com